Exporting data from FileMaker to Excel is simple when exporting from a single table. Exporting related data can also be quick and easy but it might not always come out as expected. I am going to walk through a few basic steps to export related data in a format that makes sense.
How to Export Data from FileMaker to Excel
In this example, you have a database that tracks customers. You want to export a found set of customers and their employees to an Excel file. After you have your found set, you do the normal File->Export and select the fields you want.
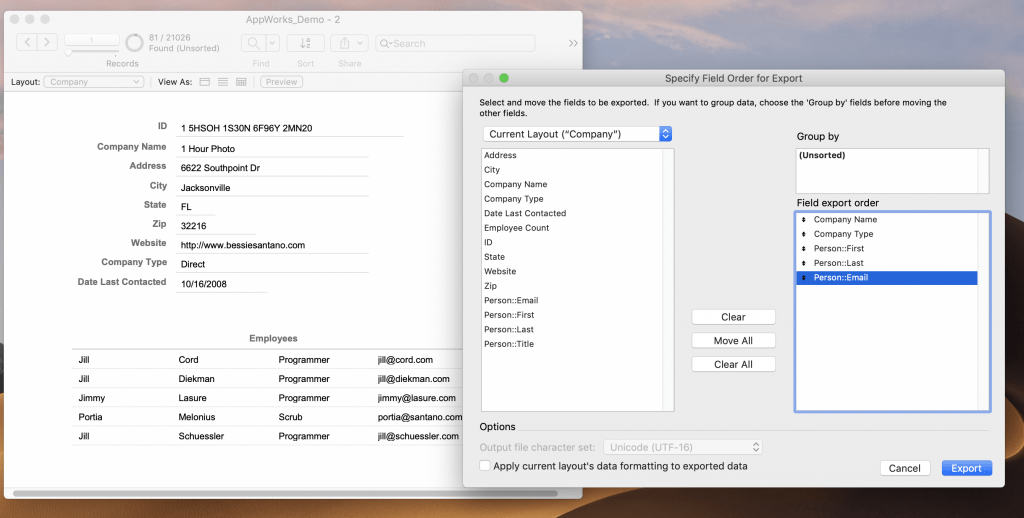
When selecting fields, use the convenient “Current Layout” area because it includes related fields that you can see. Everything looks good so you export. You get all of the employees, but the problem is that the Company table information only shows up for the first employee listed.
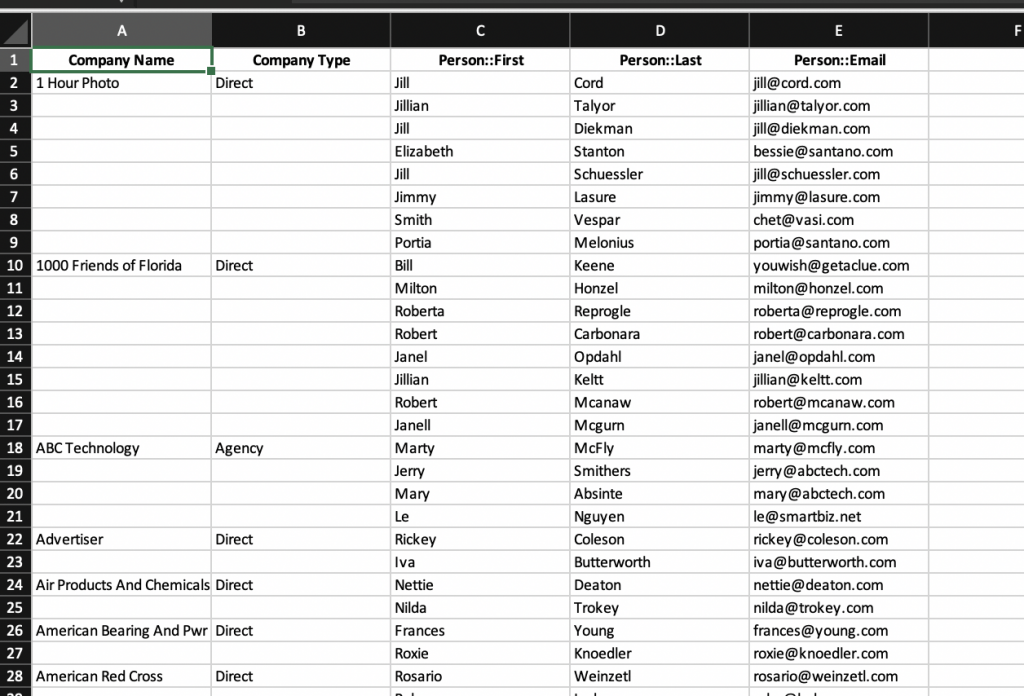
In order to fix this, you need to export from the Person table. If you start at the Person table and add related company fields, you will have company data for every row. The problem is you don’t have an easy way to bring up the same list on a Person layout. To fix this, you need to make a script that can be called from the context of a Company layout and give you the correct results.
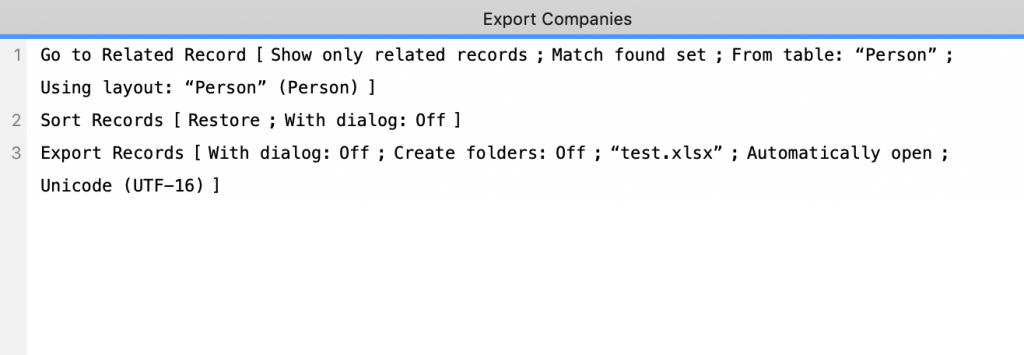
Create a new script. I will call it “Export Companies” for this example. Put in a “Go To Related Records” step that will go to the related Person table. Be sure to specify “Show only related records.” Select “Match current record only” if you want only the Company info and employees of the record you are looking at, and “Match all records in current found set” if you want to export all of the employees for all of Companies in your current search. This step will put you on a Person layout of your choice with all of the employees.
At this point you want to sort the records. When you first get to this layout, records will not be sorted. If you don’t sort, they won’t be grouped by Company. Add a sort step that specifies first Company Name from the related Company table, then any other sort options you want.
After that you need an “Export Records” step. You can specify in the script what fields you want, or choose at the time the script runs. What you end up with is something like this:
If you don’t want to be left on the Person layout you can always add a go to layout step with “Original Layout” as the target. When you run this from the Company layout, your Excel file now looks like this:
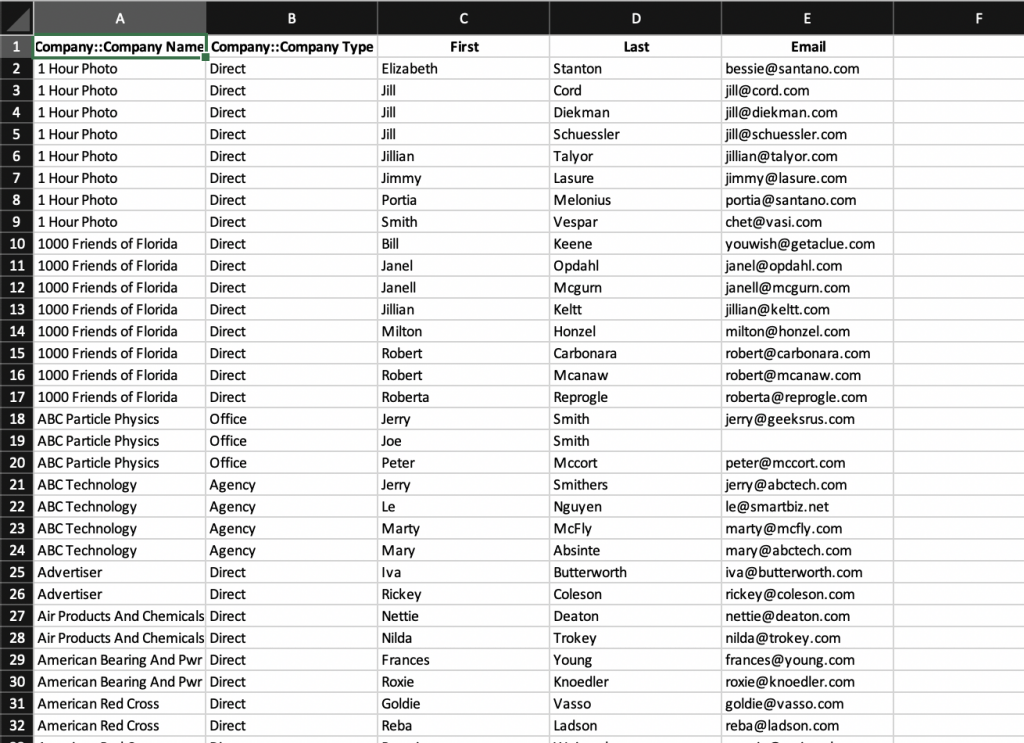
If you decide this is too much work and you are okay with only having the company info listed for one employee, there is something else to keep in mind. What you see in the portal is not necessarily what what you will get in the export. If the relationship used for the portal is the same relationship you are using to export, you will get all of the employees you see in the portal. However, you might also get more employees and they might be in a different order.
When setting up a portal on a layout, you can set certain parameters like sort and filter. As you might expect, sorting will change the order in which the records are presented. Filter will limit which records you see in the portal.
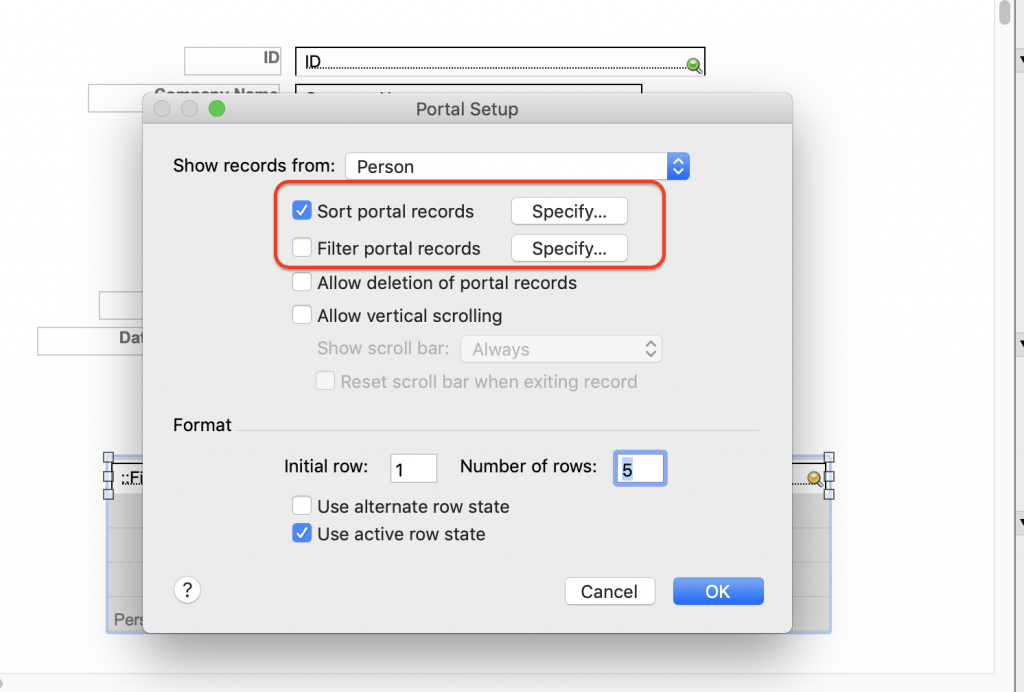
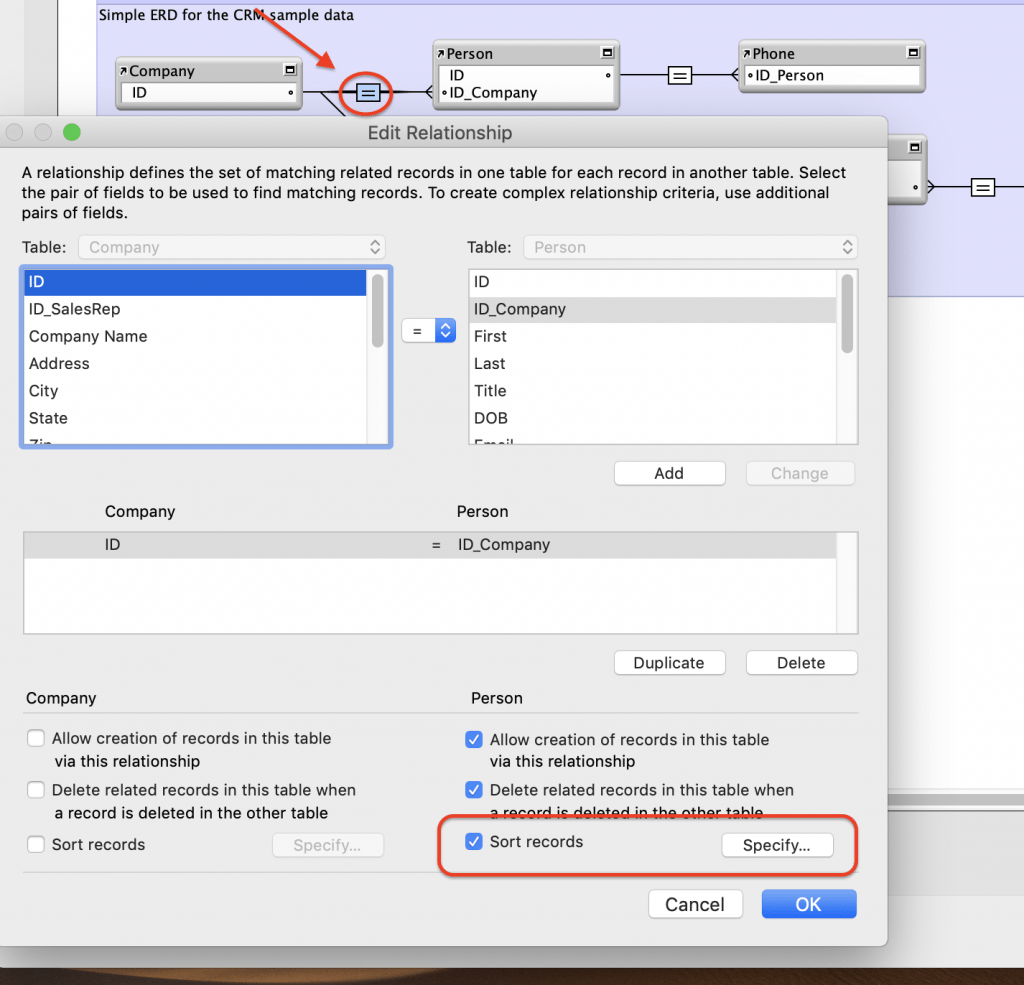
The options you set here will not affect your export. Your export will include all related records in the order in which they were created. If you records are getting sorted, but not in the way specified, then the relationship is probably sorted in the relationship graph. You can check this by going to File->Manage Relationship and double clicking on the line connecting the tables.
Formatting Your Excel Export
Let’s say the export is working perfectly, but it bugs you that the column headers for the Company data start with “Company::” and you want it to go away. If this is a one-time export, you can just edit the Excel file. If this is a regular export, and you don’t want to change it every time, there is a solution. Create a new field!
Go to File->Manage Database and view the fields for the table from which you are exporting. In this example that would be the Person table. Create a new field called “Company Name” and set it to a “Calculation” type. When setting the calculation go to the fields on the left, select Company from the table dropdown, then select Company Name. Also be sure to set the calculation result to “Text” because this will have a text value. Repeat for any other fields you want.
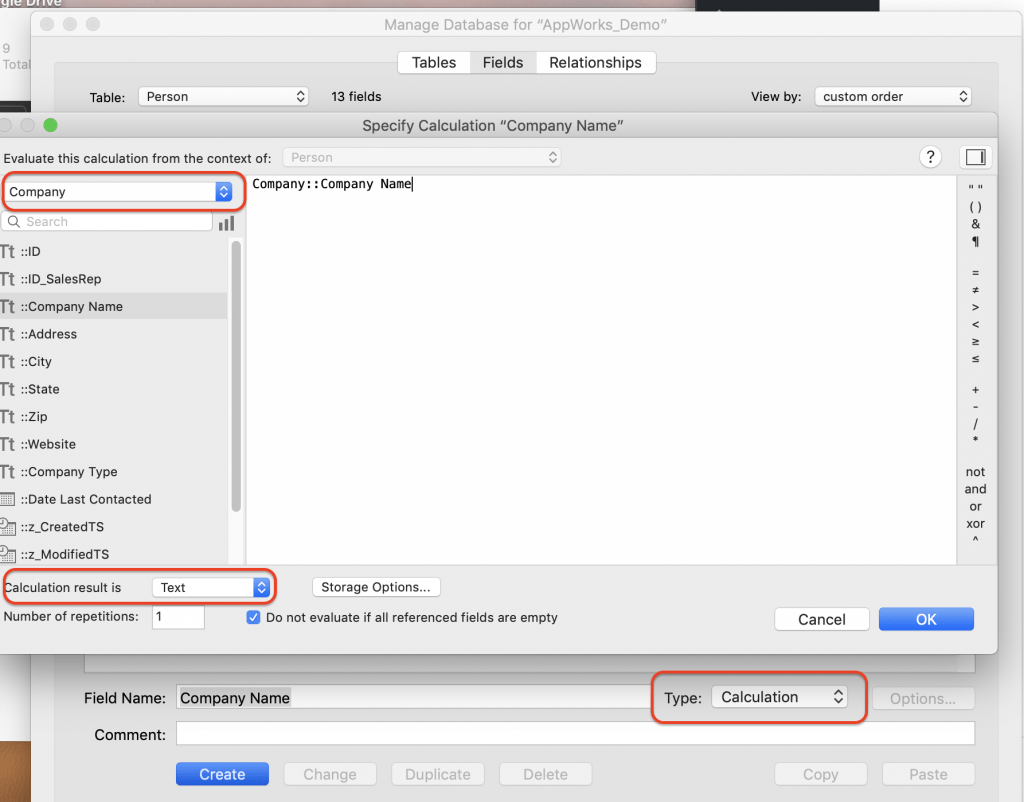
Once that is done, change your export script to use these fields instead of the fields in the Company table. In the end you get an Excel spreadsheet that looks something like this:

This method is frowned upon by those concerned about cluttering up your database with unnecessary fields. However, sometimes clutter is the only way.
On rare occasions, you might have a lot of related data from several tables, and want all of the headers to be custom. One option for dealing with that is to create a custom export table where records are only created and populated when exporting. You can then create as many fields as want, and name them however you like without cluttering up your main tables.
If you have questions about how to export FileMaker data to Excel, feel free to contact us!
*This article was originally written for AppWorks, which has since joined Direct Impact Solutions. This article is intended for informative purposes only. To the best of our knowledge, this information is accurate as of the date of publication.
